
SMTA CommandIQ® Support
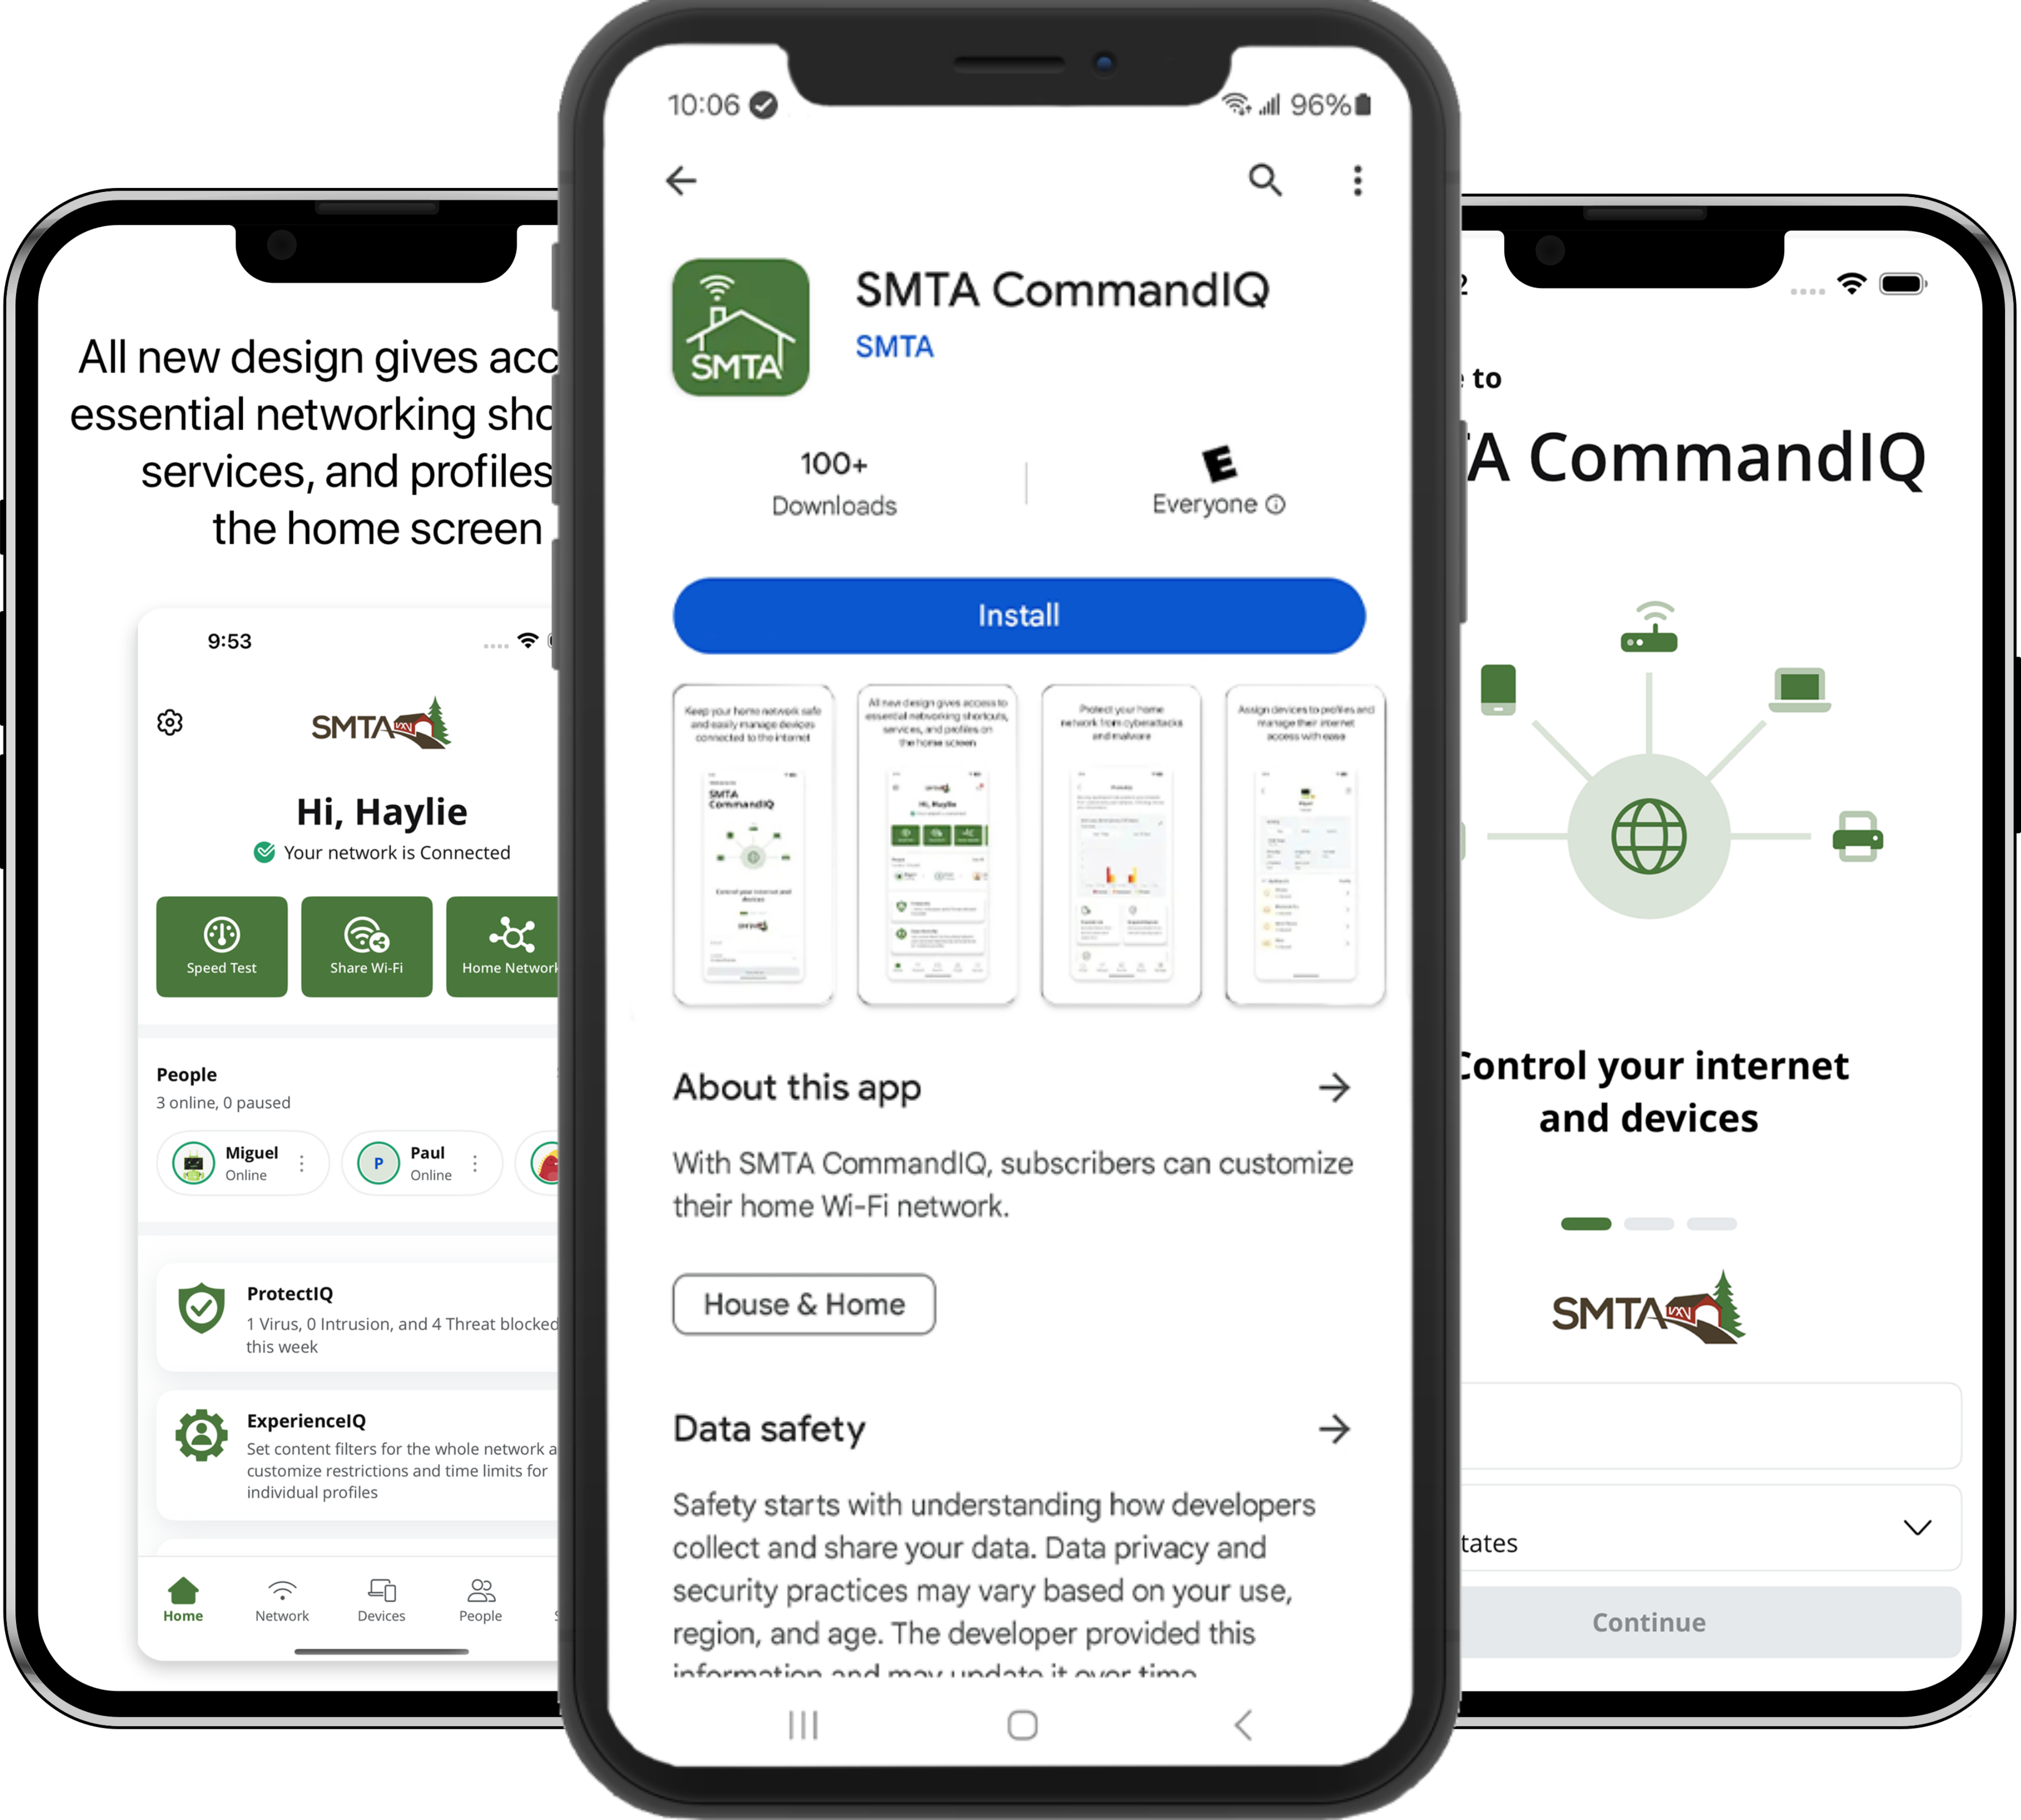
The SMTA CommandIQ® paired with the provided SMTA router equipment is the ultimate WiFi system.
If you are experienceing any issues please contact our 24 / 7 Internet Support line at 503-394-2425.
SET-UP GUIDE
To begin, download and install the SMTA CommandIQ® App from the appropriate app store:


App set up
Tap "Let's Get Started" If you forget the password to access your SMTA CommandIQ®, select "Forgot Password?" to reset and access your account.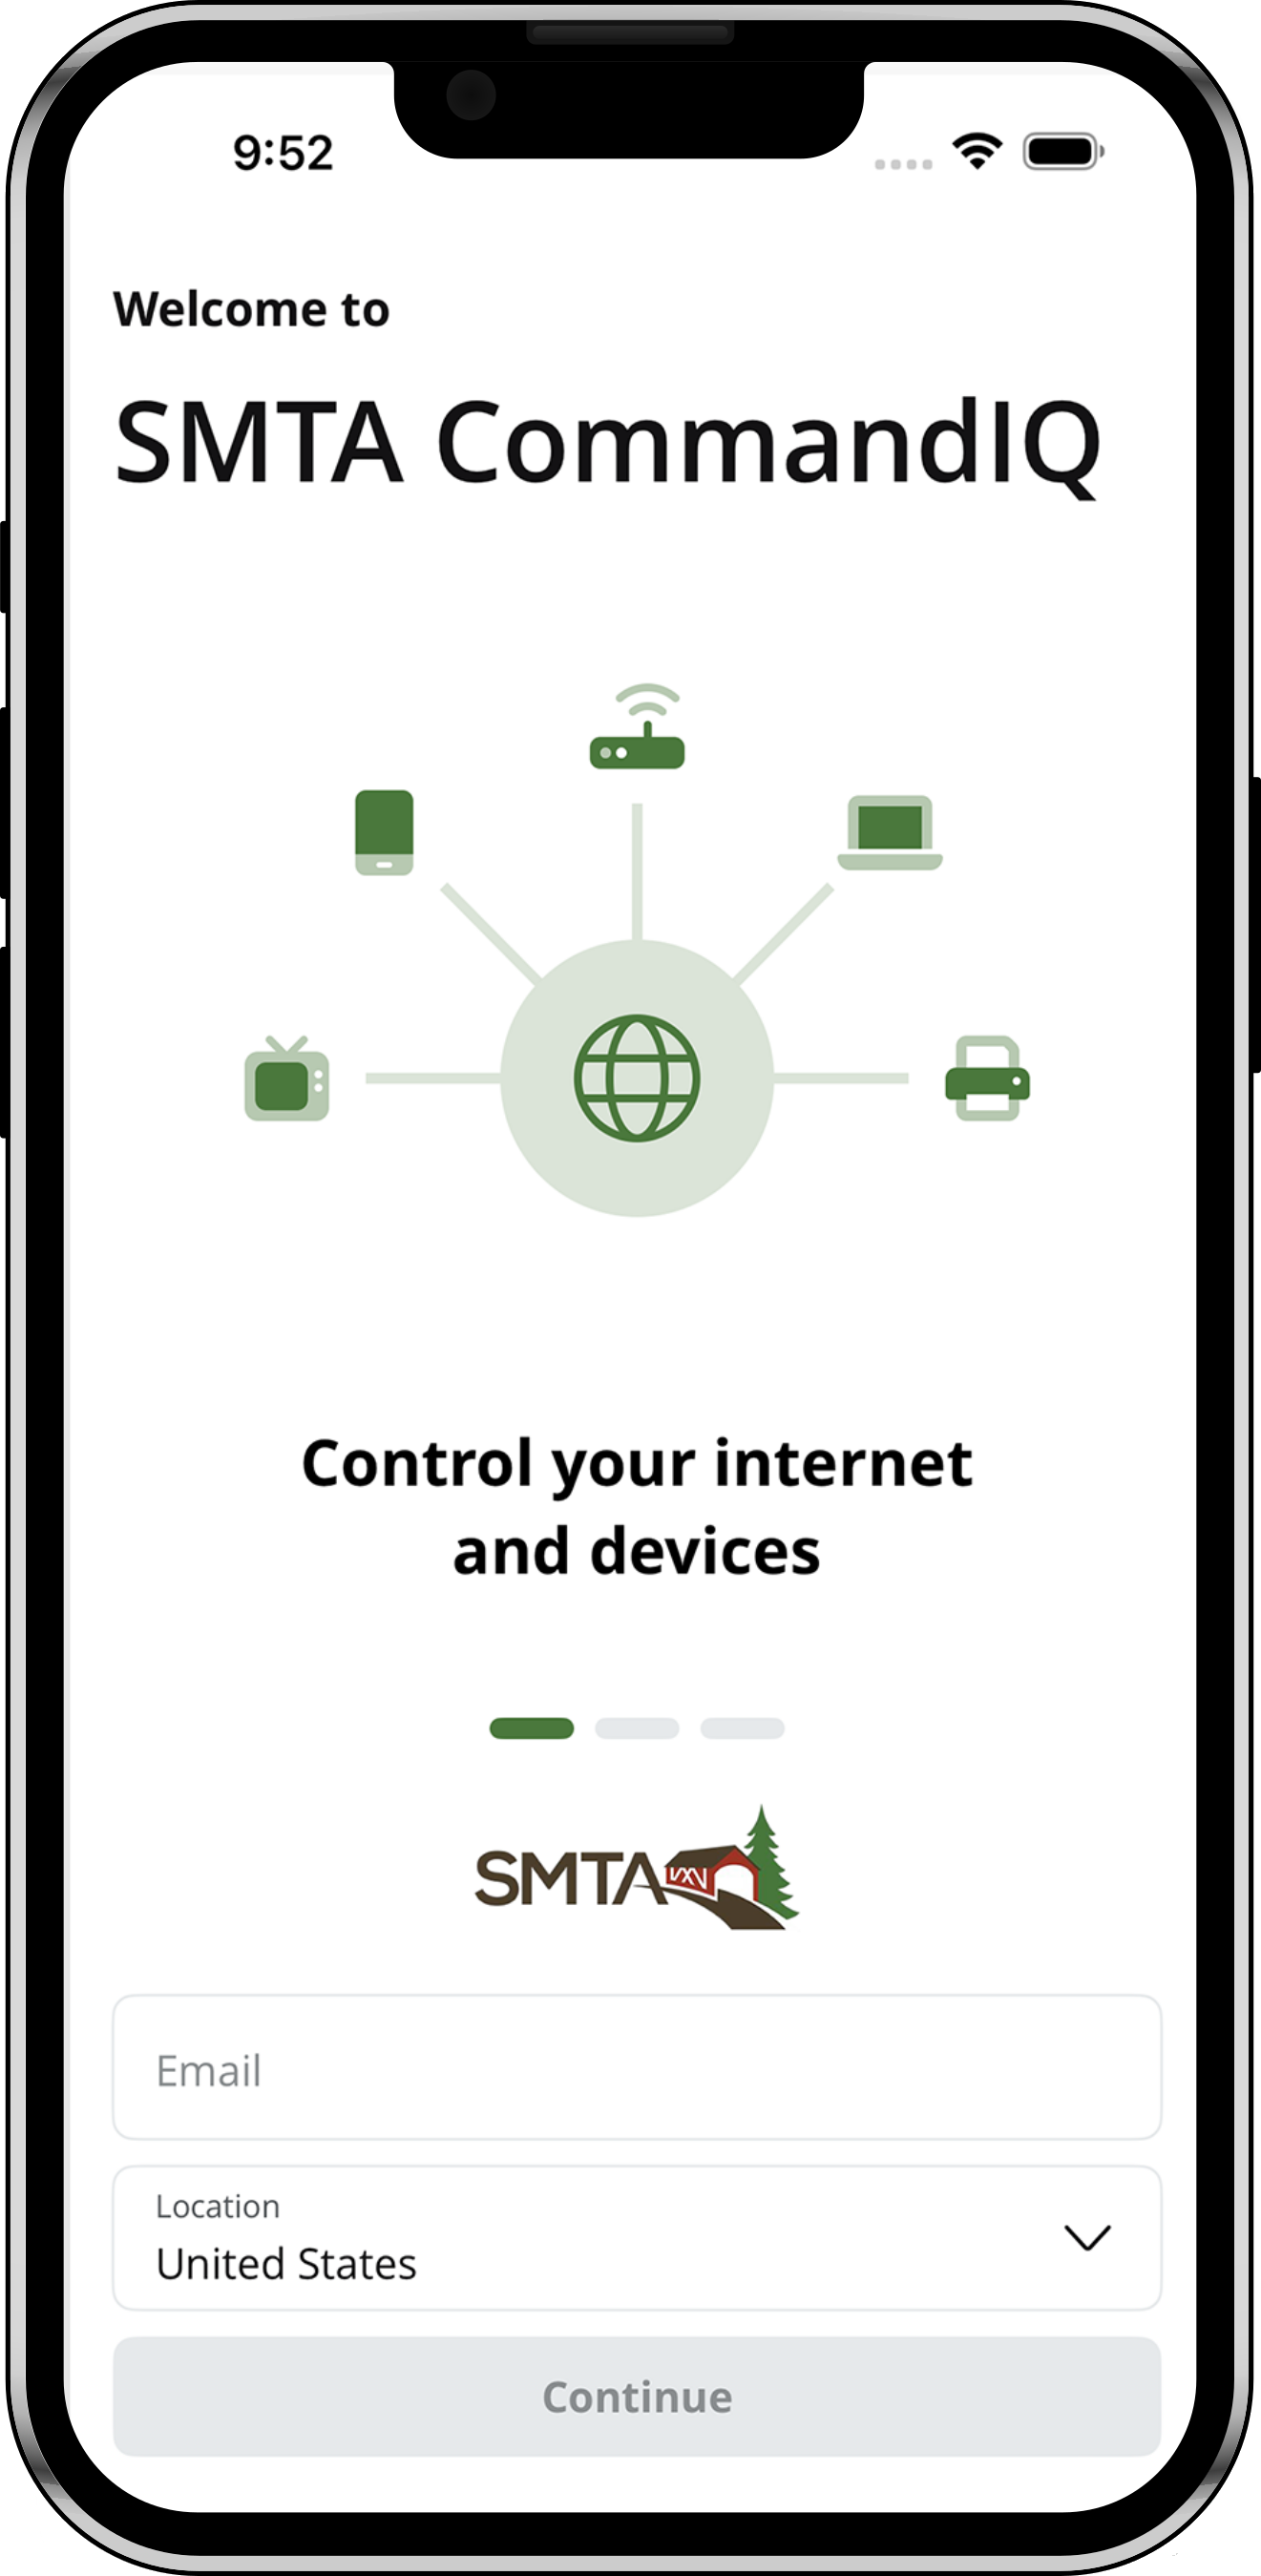
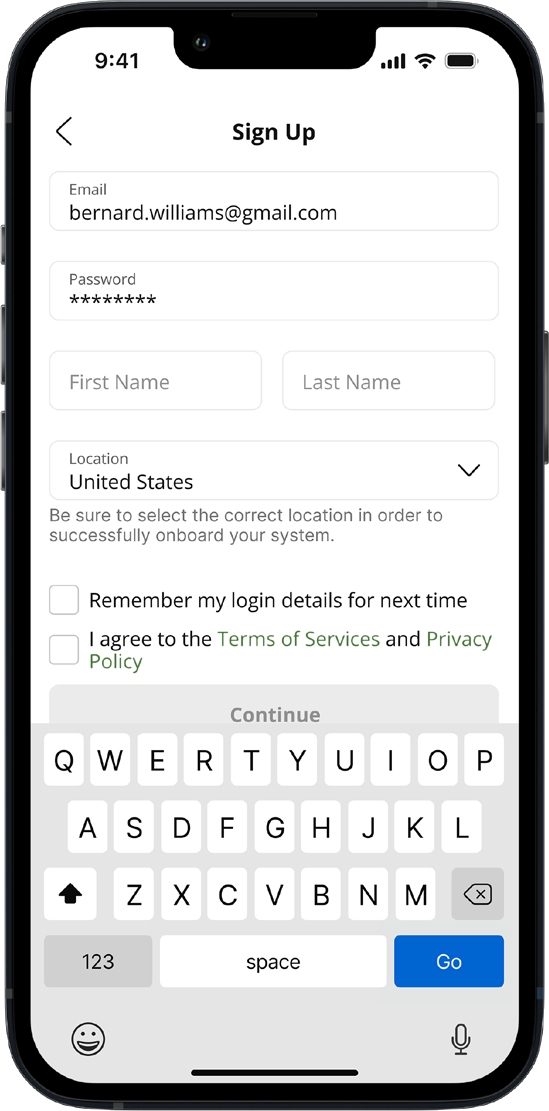
Enter basic personal information The password you enter here will be the password you use to login to the app.
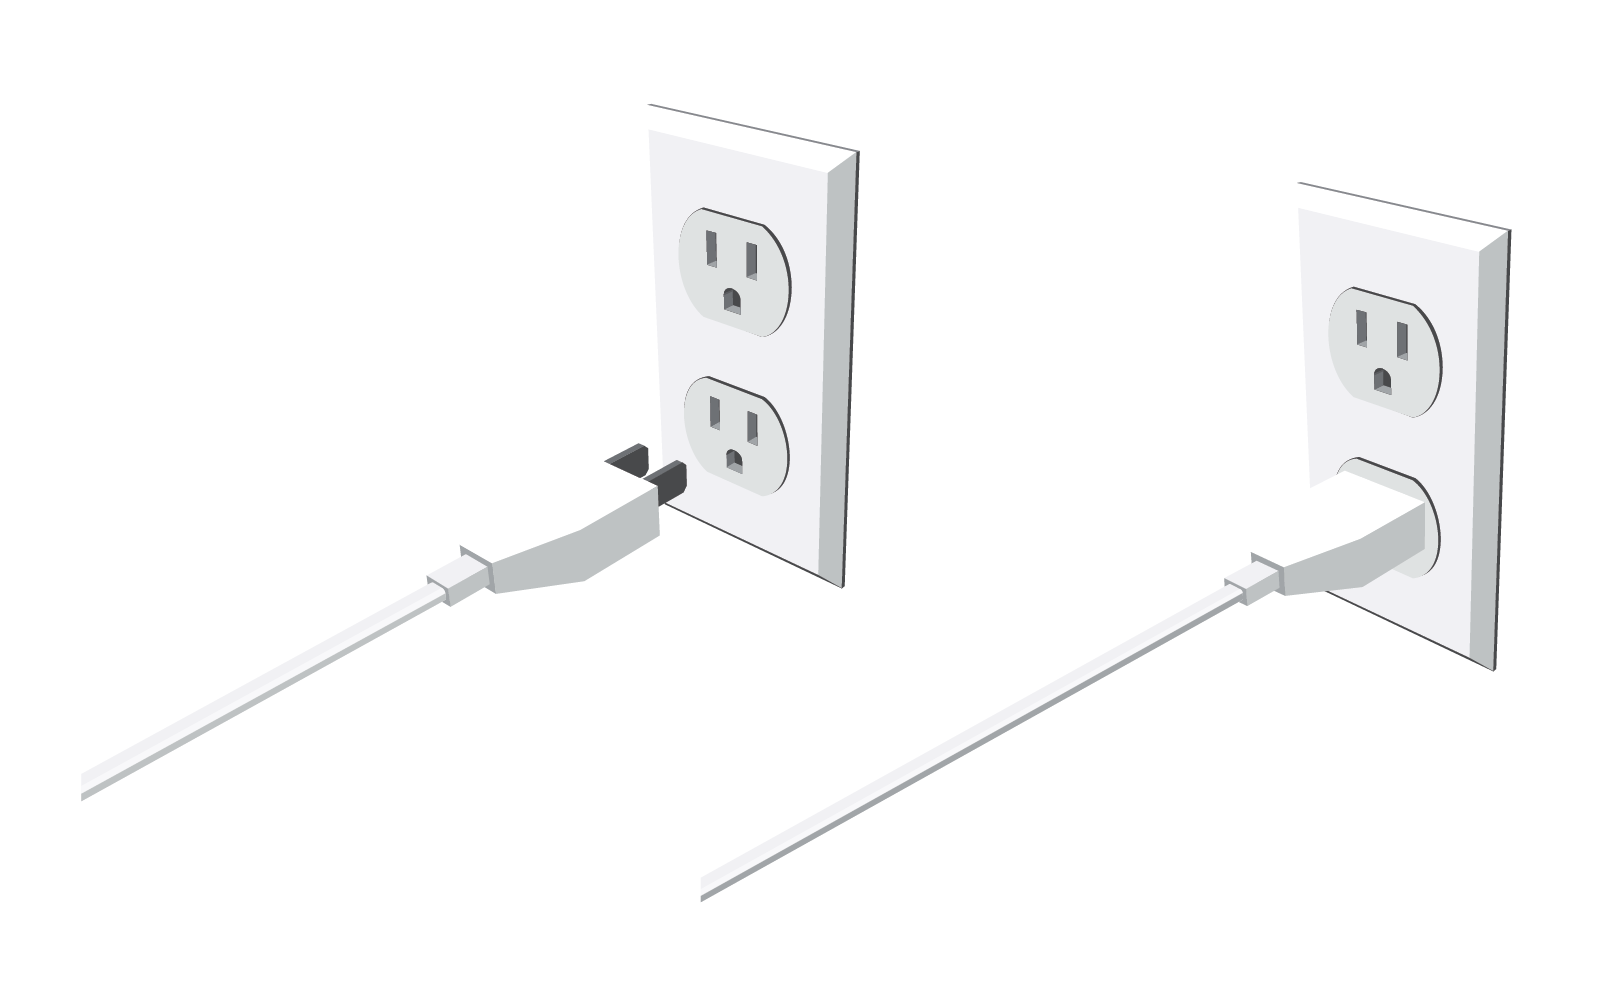
New system setup Now, plug your new system into a power outlet. It may take several minutes for the unit to be ready. You’ll know once the light turns solid blue.
Scan the QR code. Your equipment will have a metal plate on the side or bottom with a QR code. Use the camera app on your phone or tablet and scan the QR code.
Alternately, you can enter the MAC Address and Serial Number that same metal plate.
After you select “Ok”, you may be asked to enter your SMTA account number. You can find this on your SMTA bill.

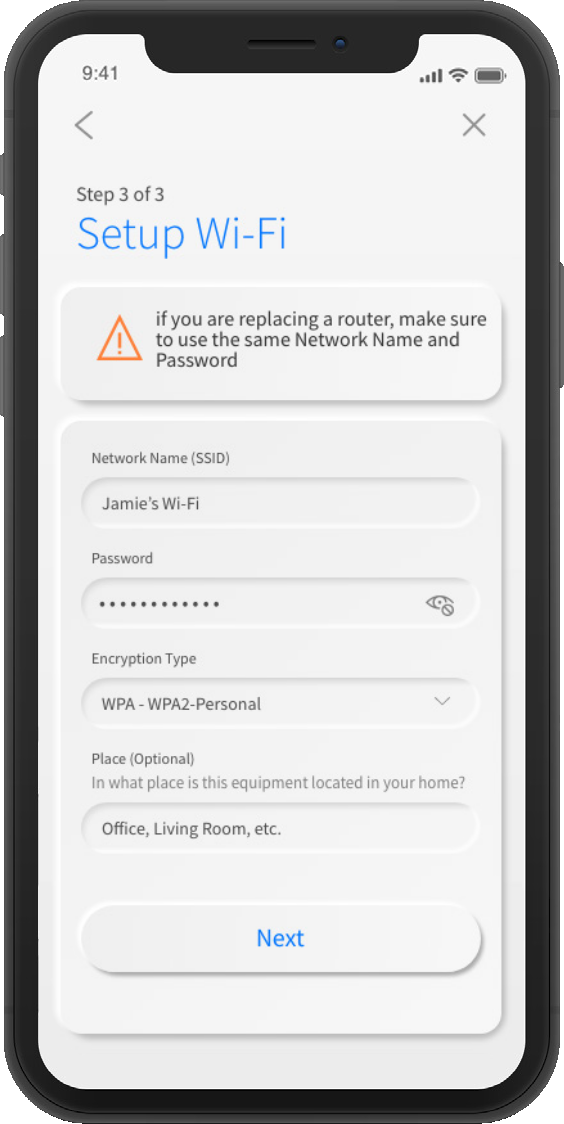
Name your network (SSID) and create a password. If you are setting up your home network for the first time, you can assign a name and password for your WiFi network (SSID).
This password should be different than the one used to log into the SMTA CommandIQ® app on Step 2. This is the password associated with your Network Name (SSID) and is asked for when connecting a new device to your network.
The Main Dashboard
Scrollable Carousel & Tiles:
This is the home screen you’ll see every time you open the app
The scrollable carousel puts everything you need—speed tests, parental controls, device lists—right on the main dashboard.
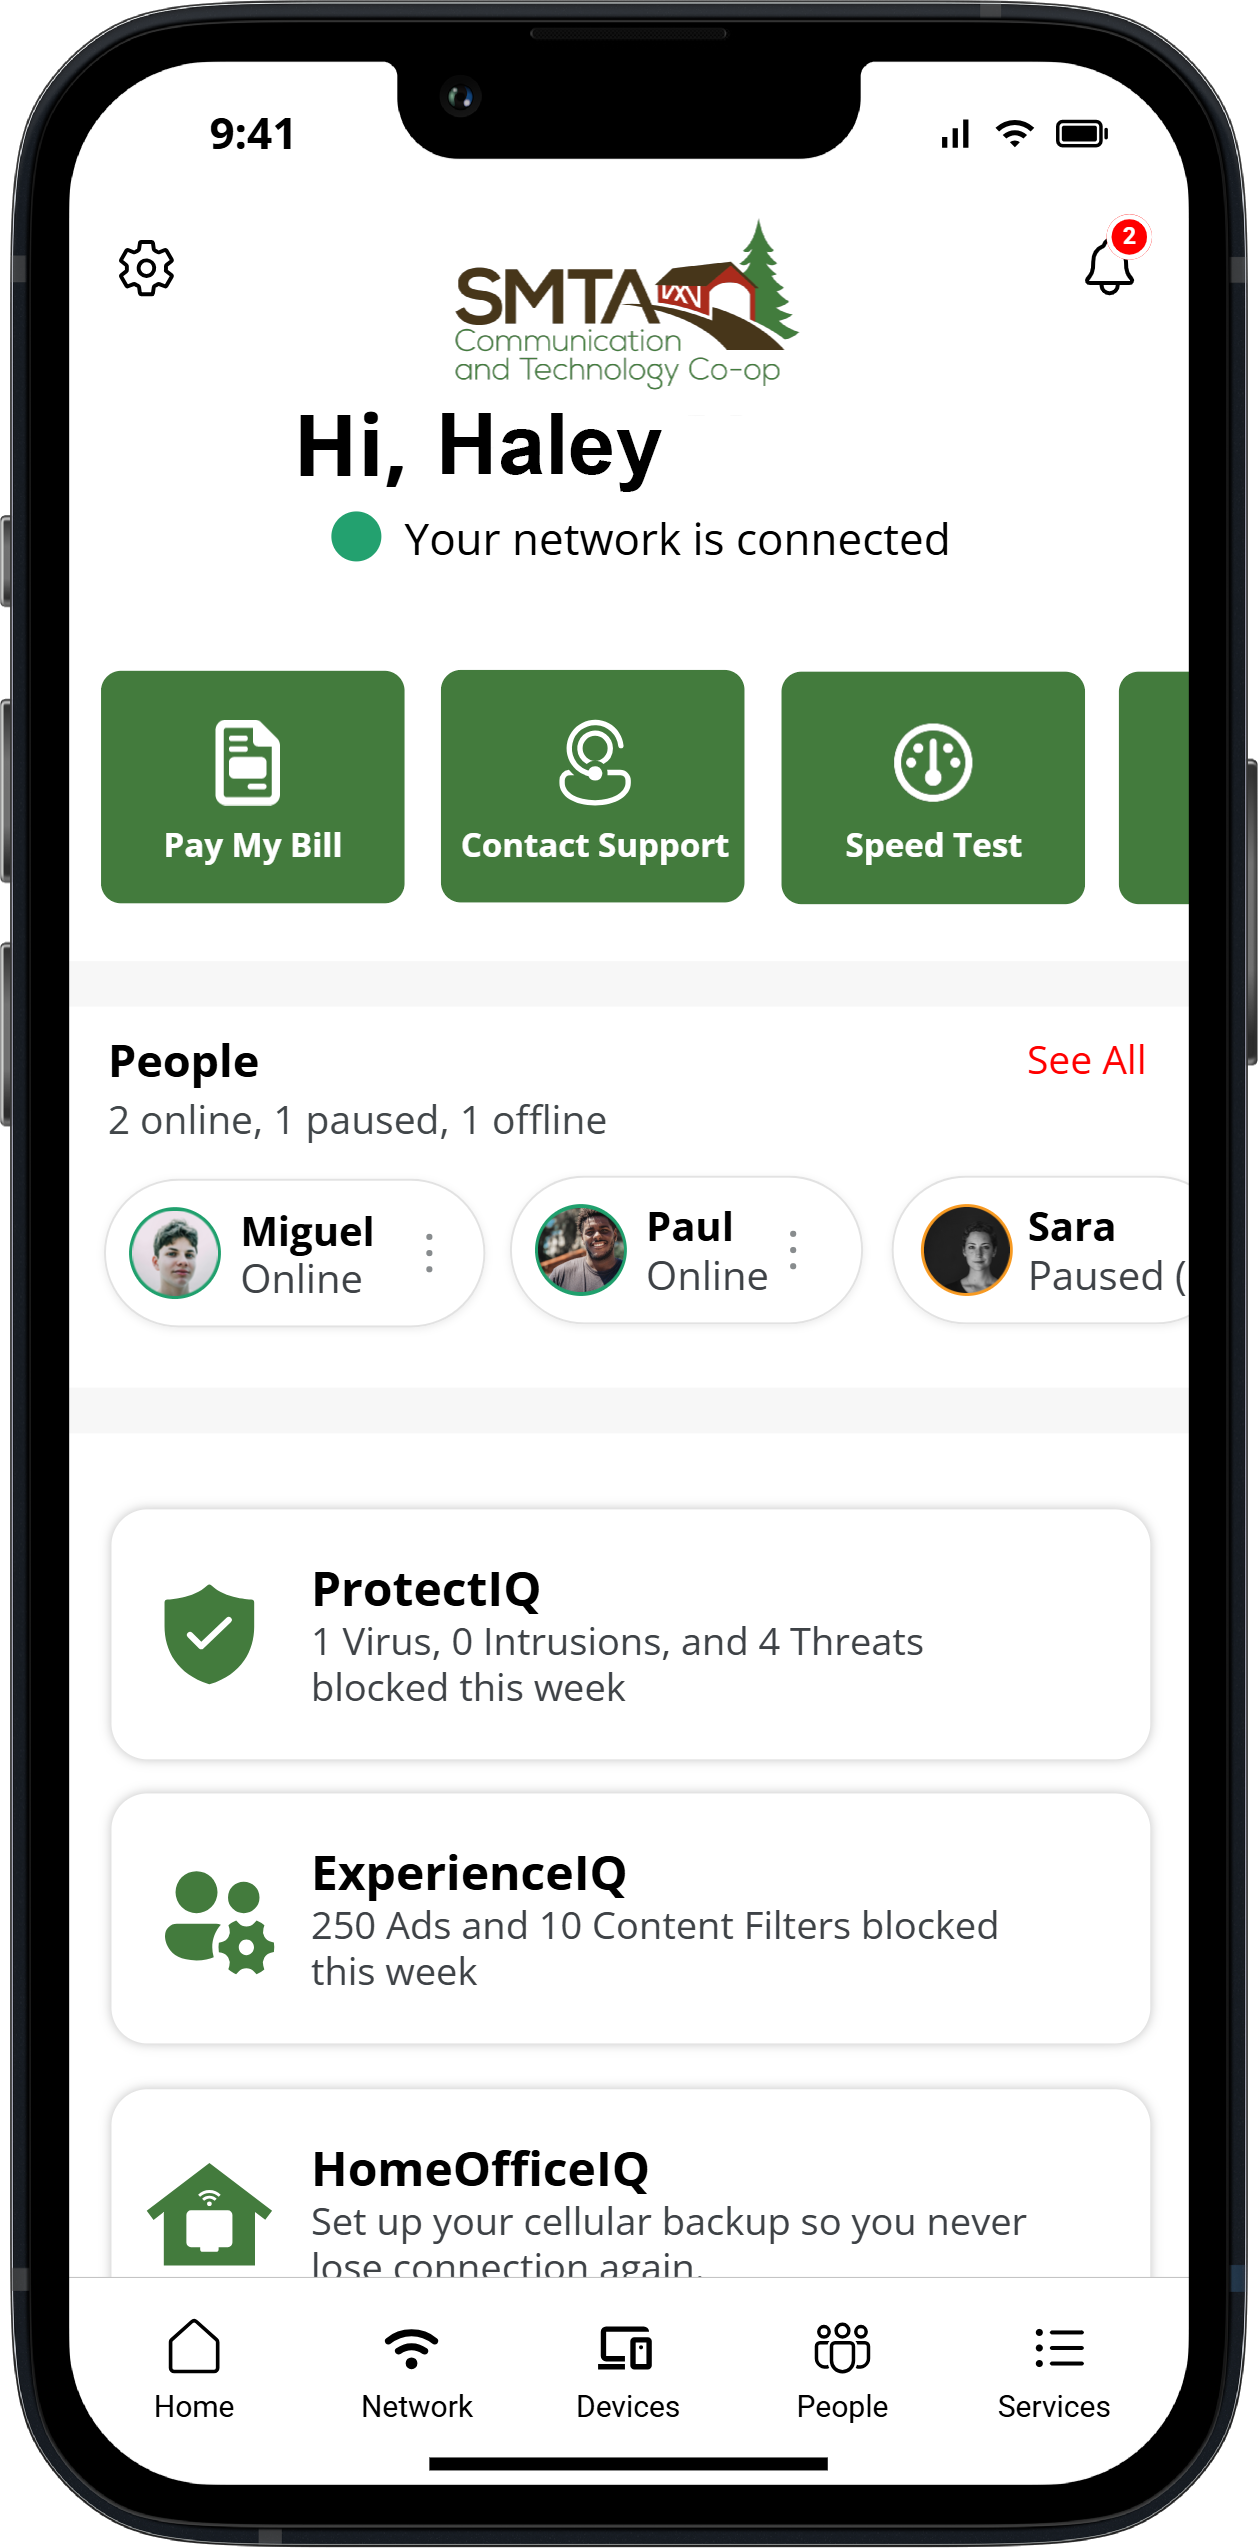
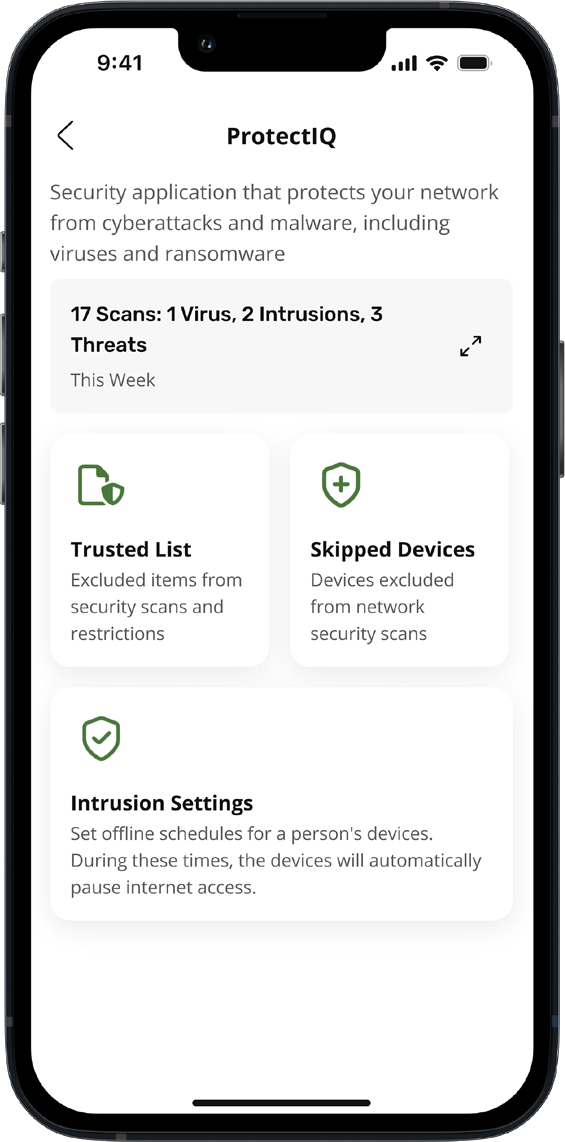
ProtectIQ
A safe digital home
The internet can be a wild place, but ProtectIQ keeps the bad stuff out. This built-in security blocks viruses, malware and sketchy web threats, so your family’s devices stay safe. Check the “Security” tab to see threats stopped in real time: Three viruses zapped today?
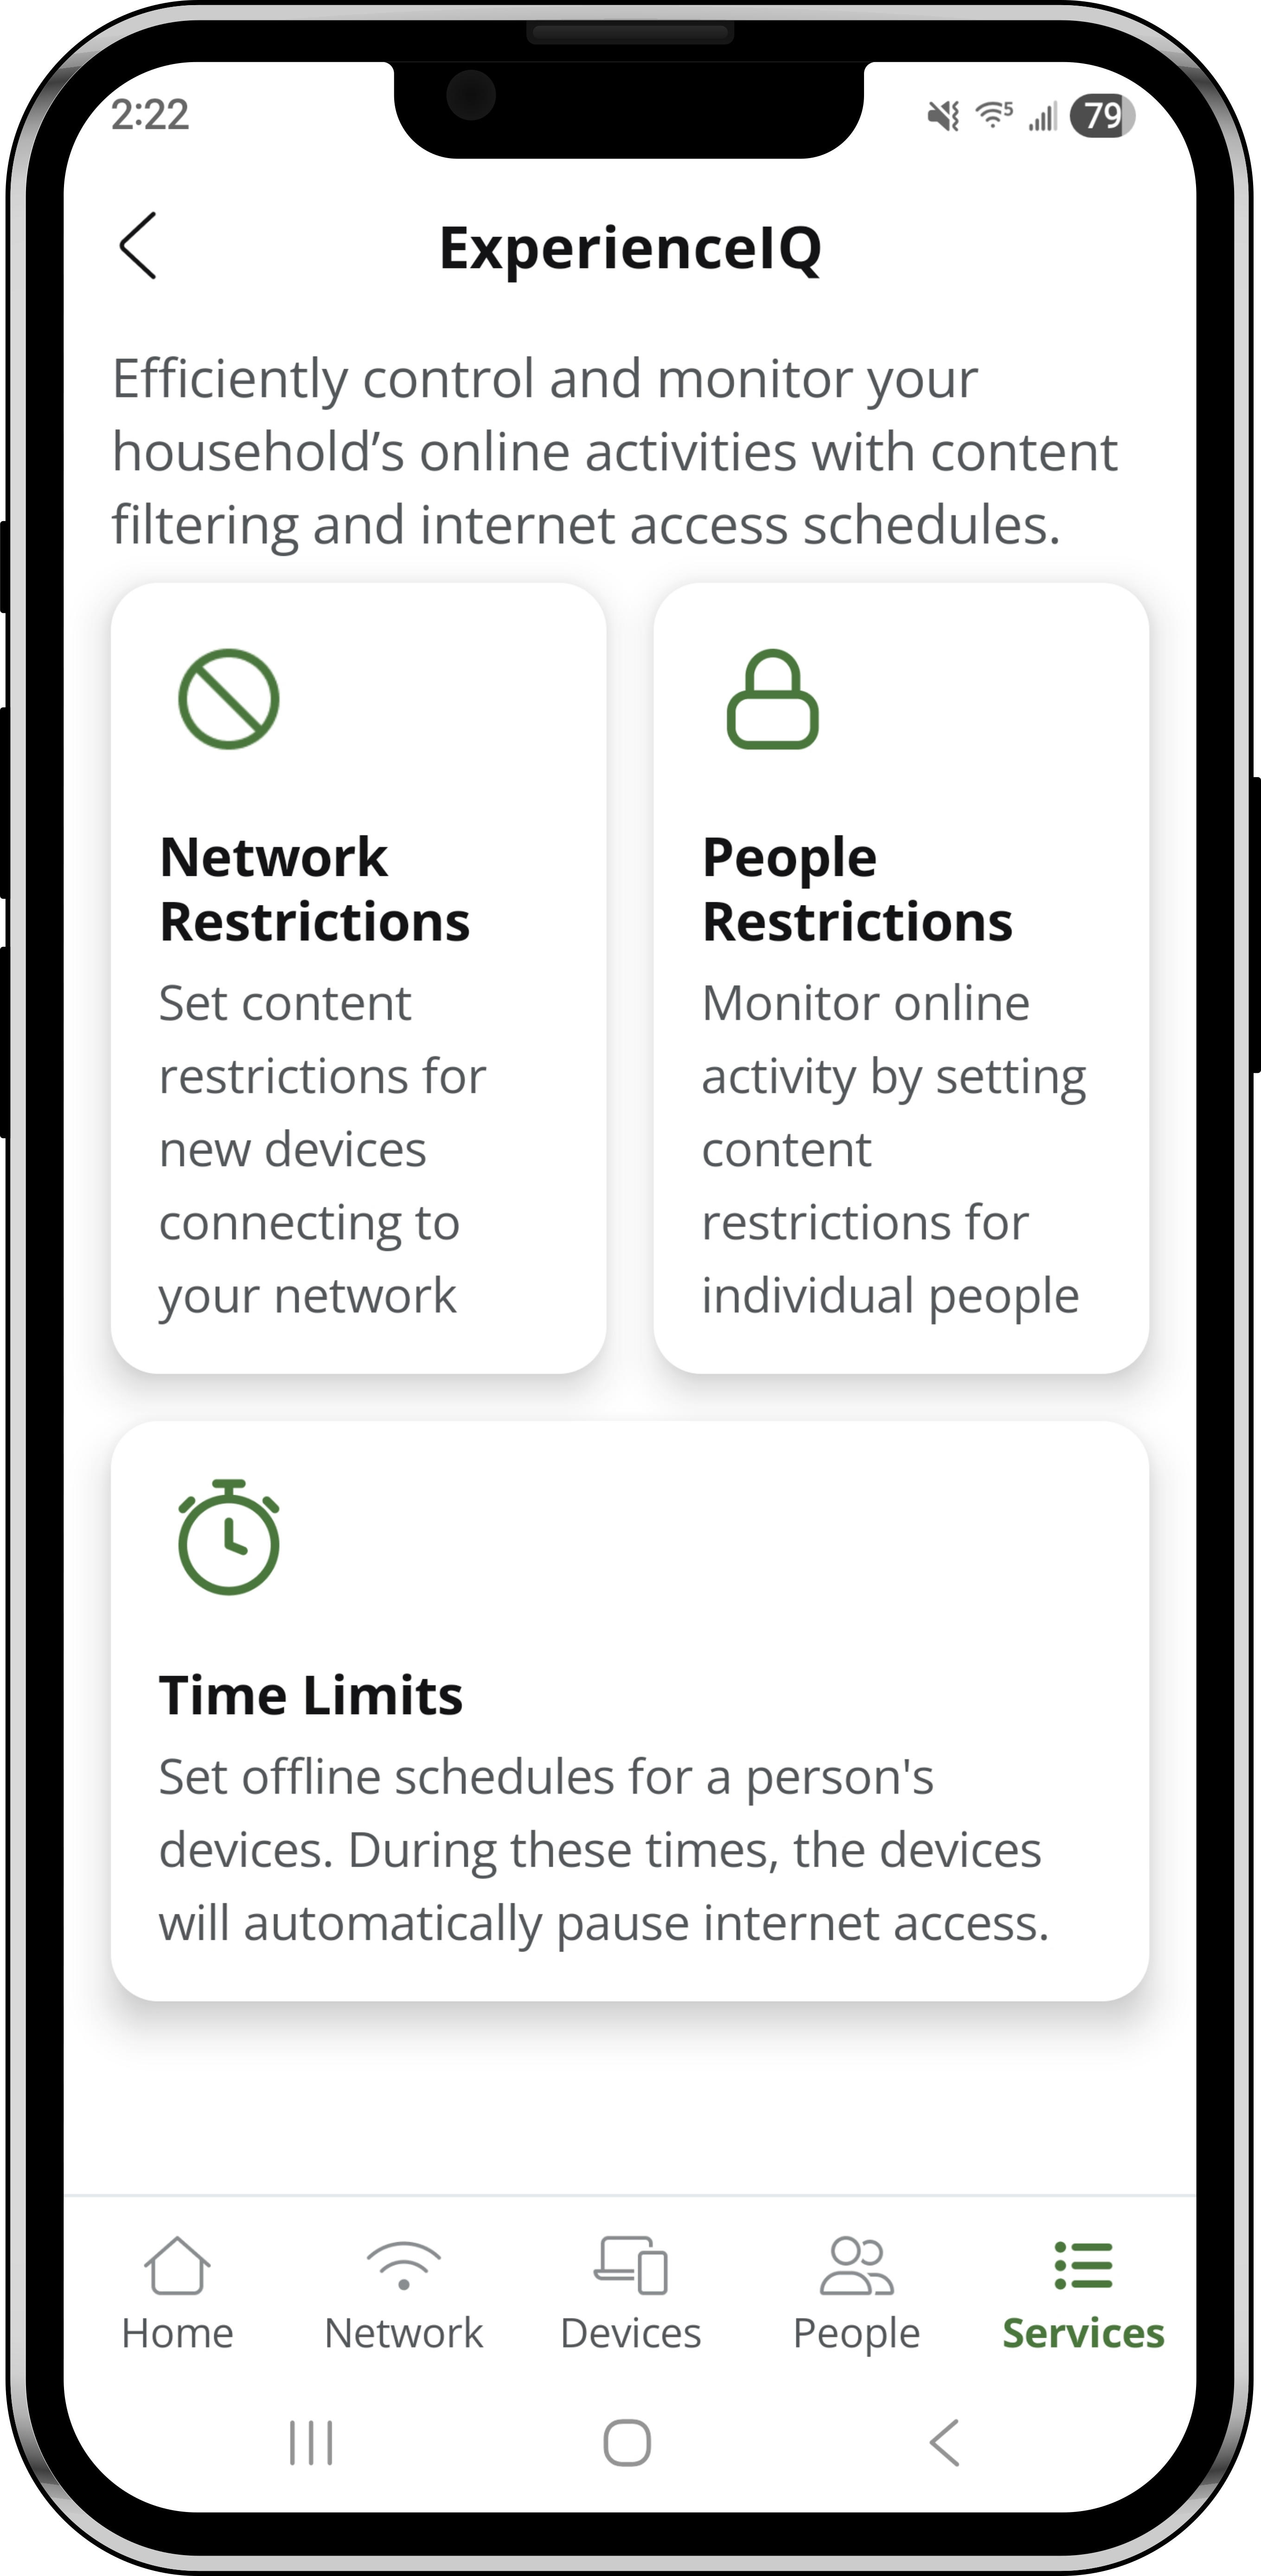
ExperienceIQ
Content control made easy
ExperiencelQ lets you set content restrictions by age or category (goodbye violent games and online gambling), block specific apps or websites and pause WiFi for bedtime or homework. Safe Search and YouTube restrictions keep searches appropriate as well.
The Bottom Tool Bar
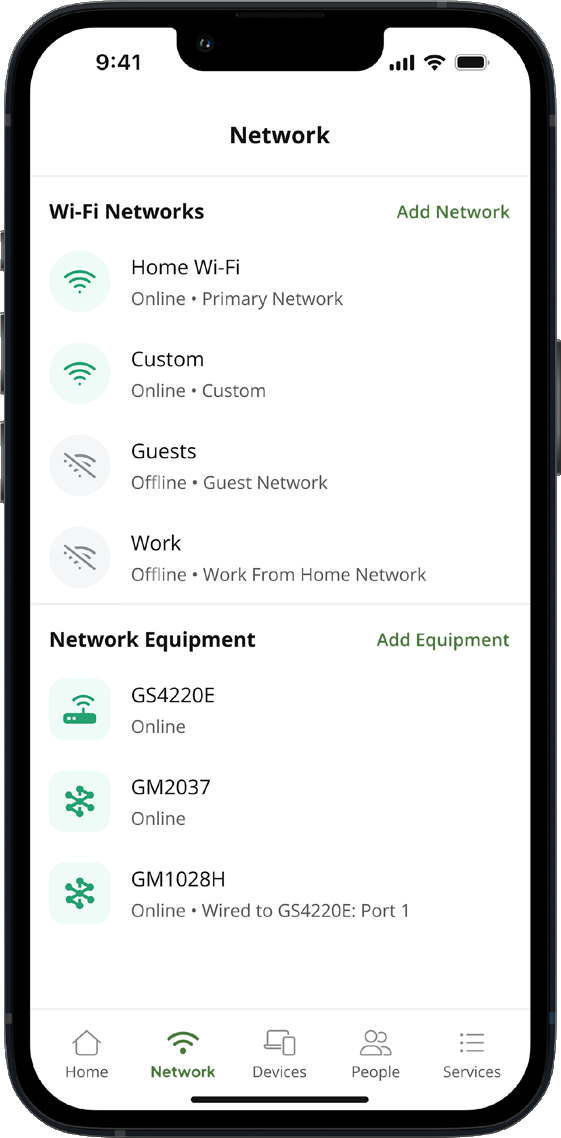
Network:
Manage your WiFi networks
From this screen, you can view your WiFi network(s) and equipment, easily share your network login details via an on-screen QR code, add a new Guest Network with custom permissions, and edit your networks’ name and password if you wish.
Whether you want to name your network something fun like Luke SkyRouter or The LAN Before Time, add a new network for guest or kid usage, or share login details for others to connect, the Networks tab makes it easy.
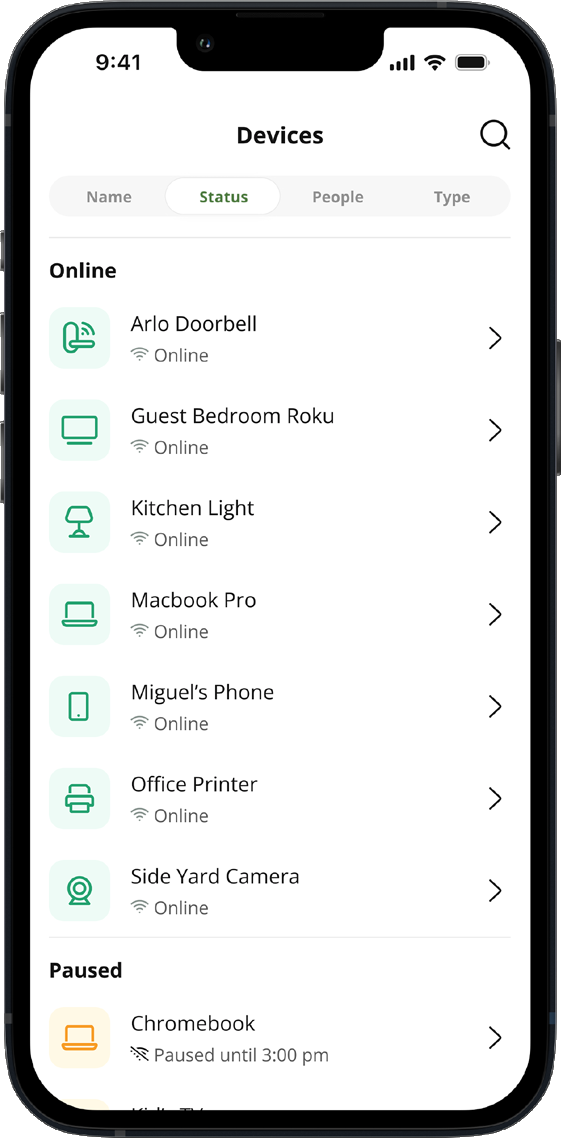
Devices:
Manage devices and view network usage
The device details screen will show the device name at the top of the screen followed by a chart that indicates the amount of data that was used by the device over a period of time.
By tapping into the edit function in the upper right corner, you can rename the device to something easier for you to identify. You can also change the category for this device by selecting the drop-down button found within “Additional Details.”
Data usage shows data used by this specific device. The bottom box shows additional connection details for this device. By toggling the On/Off button in the internet access section you can turn off or on WiFi for this device.
Network priority allows you to prioritize traffic and devices on your network.
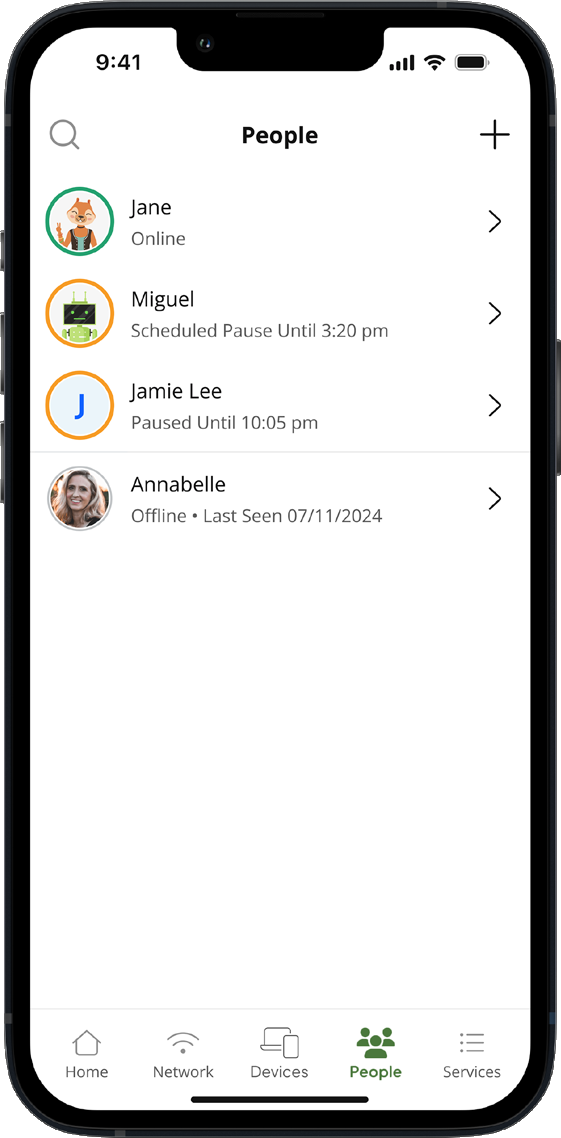

People:
Create people profiles & know who’s on your WiFi
Wondering who’s on your WiFi? CommandIQ shows every connected device, from Tanya’s tablet to Grandpa’s Smart TV. Create People profiles to easily assign devices, pause the internet, control content access and more. Knowing who is on your WiFi and seeing their connected devices has never been easier.
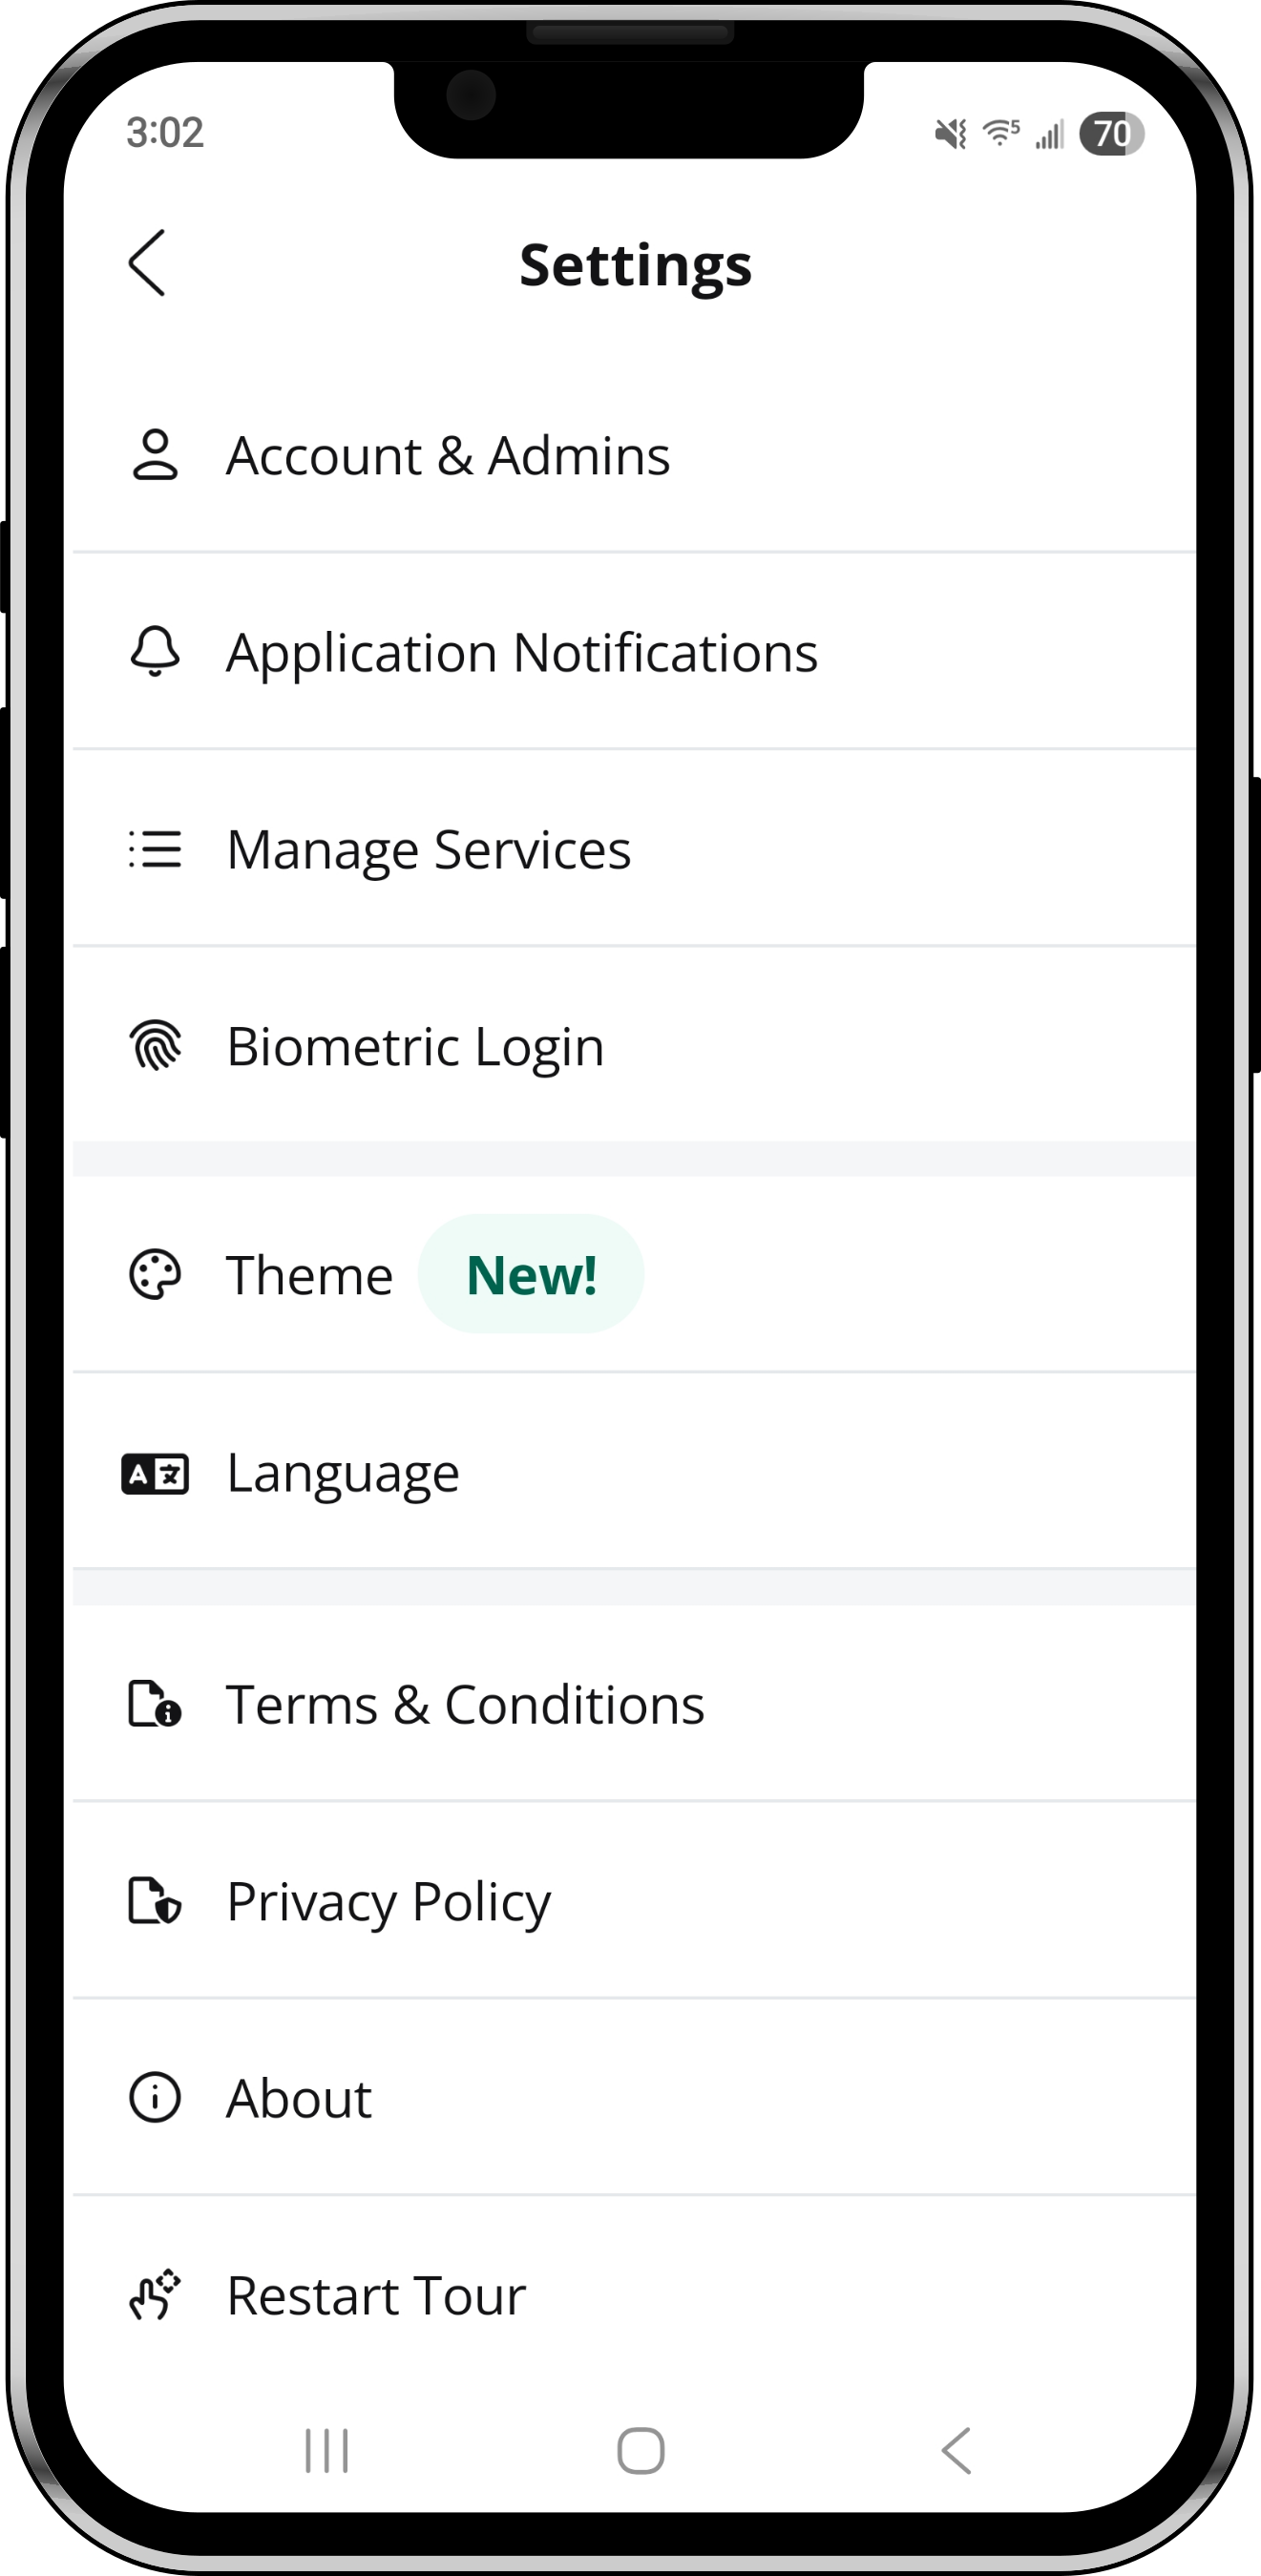
Settings:
A world of customization is available to you by tapping into the “Gear” icon at the top-left of the app home screen
Account & Admins - This shows your name, email, and password for the CommandIQ app. You can also add a secondary admin here to give a family member access to control your networ through the app on their device.
Application Notifications - To receive notifications from the app, leave this in the ON position.
Biometric Login - Log in using fingerprint or facial recognition, depending on your device settings.
Theme Use - the app in Light or Dark mode.
Language - Choose your preferred language.
Terms & Conditions - Provides the terms and conditions you acknowledge by using the app.
Privacy policy - Provides the privacy policy of the app.
About - Provides a brief summary of what the app does.
Log Out Provides the ability to log out of the app.
Restart Tour View the app’s new features.
Bandwidth Test (Speed Test)
Check your internet speed and connection
The easiest way to run a bandwidth test is by tapping into “My Network” and then “Bandwidth Test”. Then simply tap the Run Test button. The speed test will first run between the router and the internet and then will conduct a speed test between any mesh units and the router. Results will show as a notification in the app.
Note: This feature is only available with a SMTA router.
Guest Network
Create and share a safe WiFi network for your guests
When you tap the “My Network” section from the top of the main menu you will have the option to create a guest network by selecting “Networks.”
In the “Add Network” screen, do the following:
- Set the name of the wireless guest network as you want it to appear for your guests.
- In the drop-down box, you can choose to set a password for this guest network, which is highly recommended to keep your network safe.
- This will bring up additional boxes for you to set and confirm your password.
- If you set this network to endless, it will stay available.
- The alternative is to set a start and end time for this guest login to be valid.
- Once you have set the parameters for your guest network, select “Done” at the top of the screen.
- You have the option to share your new network with your guests via text, email or other messaging service.
- To edit your guest network, select “My Network” from the home screen. Select “Networks” and select the network you wish to edit or delete.
Tips and Tricks
Common Connection Challenges
Scan for your SSID (your WiFi network name) in the WiFi menu on your phone, computer, or other device. Type in the password selected at creation to confirm WiFi setup completed successfully.
- If a device was on your previous WiFi network and won’t connect, make the device ‘forget’ the network. Wait a few minutes. Then try to connect the device to the new network again.
- Devices that are prone to having issues connecting to a new network easily include:
- Wireless Printers
- Smartphones
- Smart TVs
Router Location
- Centrally locate the router / gateway in your home so the WiFi signal can travel better.
- Keep the router / gateway away from walls, bulky furniture, and electrical appliances that might interfere with its radio signals.
Router Performance
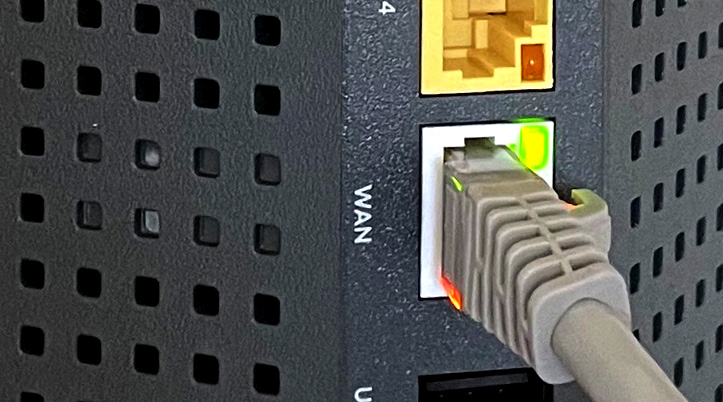
- Are your router / gateway lights blinking properly? The light indicating the status of your Internet connection is typically labeled WAN, Internet, or with a globe icon. You can tell it’s working if the light is solid or blinking.